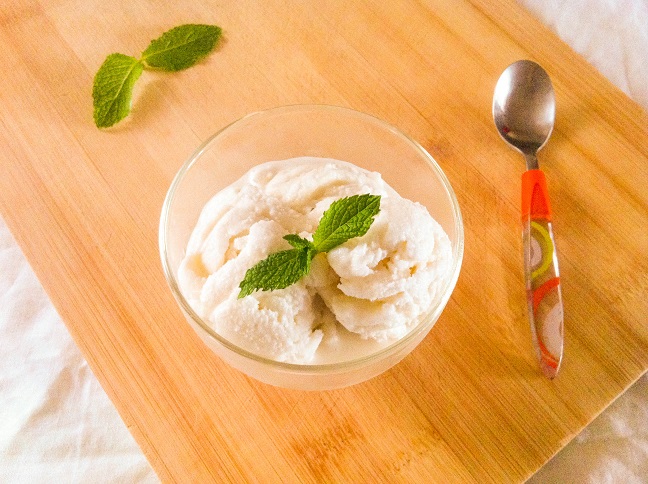
Creamy coconut milk mixed with condensed milk for a simple yet amazing little dessert. With just two ingredients, this ice cream is coconut-y and rich with just the right amount of sweetness.
We almost never have freezer space, but I always like to keep a pint of ice cream in there, in case of emergencies. You never know when you need your ice cream.
I love ice cream (and chocolate) because there are so many varieties. You just can’t try them all. But as much as I like eating them, I can’t eat too much of it. I feel that many of the brand name ice creams are way too sweet, which means I can only eat a spoonful or two before I have to stick it back in the freezer. Does anyone else feel the same way?
My favorite ice cream comes from Mitchell’s. I don’t think they sell outside of the San Francisco Bay Area, but if you ever have the chance to try them, they have the most amazing green tea ice cream, and even more mind blowing their buko (young coconut) ice cream. My dad used to buy them in party size, as in 1.5 gallons worth of ice cream. It’s ice cream heaven for me, my sisters, and our visiting cousins. But don’t worry. My parents monitored how much ice cream we were allowed to eat each day so we didn’t get to overindulge.
I love the idea of making my own ice cream because I would be able to customize it with my favorite flavors and ingredients. Unfortunately, I don’t have an ice cream machine. But that just means I have to get creative.
If you’ve wanted to make ice cream that doesn’t require an ice cream machine (like me!), you’ll want to try this recipe. I’ve been working to create ice cream recipes that don’t require an ice machine (mostly because I don’t have one). If you’re a fan of coconut ice cream, or coconut milk, I really think you’ll like this recipe. And if you’re not into coconut, you can try these other ice cream recipes: my Acai Banana Ice Cream and my Avocado Ice Cream.
This coconut ice cream is soo good. It’s sweetened to your liking and very creamy and coconut-y. Duh, right?
All you need is one cup of coconut milk or coconut cream, either would work, and a 1/3 to a ½ cup of condensed milk. That’s it. If you prefer your ice cream less sweet, I recommend 1/3 cup, but if you like your ice cream sweeter, a ½ cup. I used a half cup. =)
Once you’ve mixed the coconut milk with the condensed milk until it becomes evenly incorporated, pour the mixture into a freezable container. Place it in the freezer overnight. What I love is that the coconut condensed milk doesn’t completely harden in the freezer.
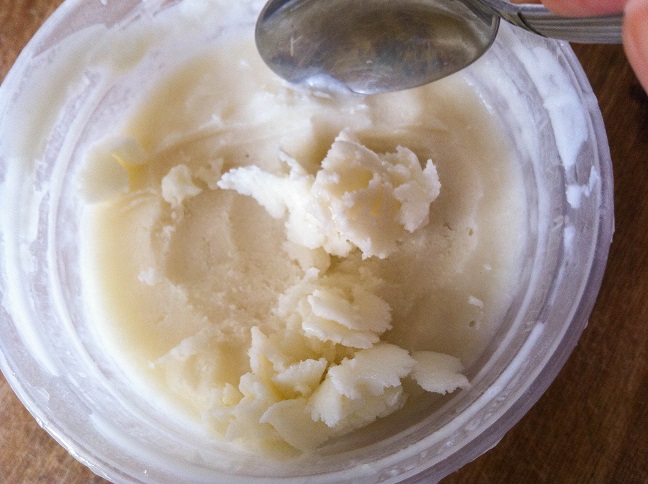
When you’re ready to eat the ice cream, use a spoon to scrap the top layers. I originally wanted to create shaved snow, which is similar to shaved ice, just softer. These shavings slowly start to form a little round ball as you’re scraping, like an ice cream scoop, perfect for serving.
Serve immediately cold.
Enjoy!
Want instant updates? Follow me on Facebook, Twitter, Instagram, or Bloglovin.
Did you know that if you’re not ready to print a recipe, you can save the recipe into an online recipe box through Ziplist? It’s completely free to sign up and easy to use to organize your recipes as well as your grocery list.
Print
Coconut Ice Cream
-
 Prep Time: 5 minutes
 -
 Total Time: 12 hours
 -
 Yield: 2 servings 1x
Description
Creamy coconut milk mixed with condensed milk for a simple yet amazing little dessert. With just two ingredients, this ice cream is coconut-y and rich with just the right amount of sweetness.
Author: Andrea Giang
Ingredients
- 1 cup coconut milk or coconut cream
- 1/3 – ½ cup condensed milk
Instructions
- Mix coconut milk and condensed milk together until they are evenly incorporated.
- Pour the coconut milk and condensed milk mixture into a container that’s freezer safe.
- Allow the ice cream to set overnight.
- When ready to serve, use a metal spoon to scrape the surface to create shavings. The shavings will form into a round shape similar to an ice cream scoop.
- Serve the ice cream immediately.
Disclaimer: This post contains affiliate links.


Thank you for the recipe. I recently discovered coconut ice cream and will try this recipe for our next BBQ. In love and light Cheryle
Sounds and looks so yumm… I love such easy recipes!
Another amazing recipe…your blog is making me hungry!
Thanks, Emily! I really hope you’ll like this ice cream.
I don’t have an ice machine either! It’s perfect! Do you have other recipes ?
I have a green tea one coming up soon. Plus you can find my Acai Banana Ice Cream or Avocado Ice Cream. Those don’t require ice cream machines either =)
Sounds so good and easy. Can’t wait to try it. Thanks for sharing.
I hope you’ll like it!
I’m running out to buy some condensed milk so I can try this.
I hope you’ll like the ice cream!
I did like it! It’s just like the Mexican coconut popsicles I get at the store sometimes (I don’t know exactly what they are because the labels are all in Spanish). I added sugar to taste, and next time I’ll probably use sweetened coconut milk.
Your food looks delicious and your food photography is beautiful!!
Thank you so much!
Anytime!
Hi Andrea, thank you for the recipes they look beautiful , can’t wait to try them 🙂 for the coconut ice cream, is there any substitutes for coconut? Since people in my family doesn’t really into coconut…
Usually people use heavy cream for their ice creams, I chose to use coconut milk for this to create a coconut flavored ice cream. You can try using heavy cream and adding your own flavor. Hope that helps! =)
Wow this looks really good! 🙂
Thanks, Bec!
Yum! looks incredible with just 2 ingredients…
Thank you!